In the lead-up to the 2021 CrossFit Open, we will be offering a series of carefully curated tips to help you master movements that commonly appear in Open programming. The Master the Movement series will provide expert advice from CrossFit Seminar Staff members on how you can bring your best self to this year’s competition.
The Open challenges the most elite athletes with tests of strength, skill, and endurance, while also challenging the newcomer who is still working toward mastering common CrossFit movements.
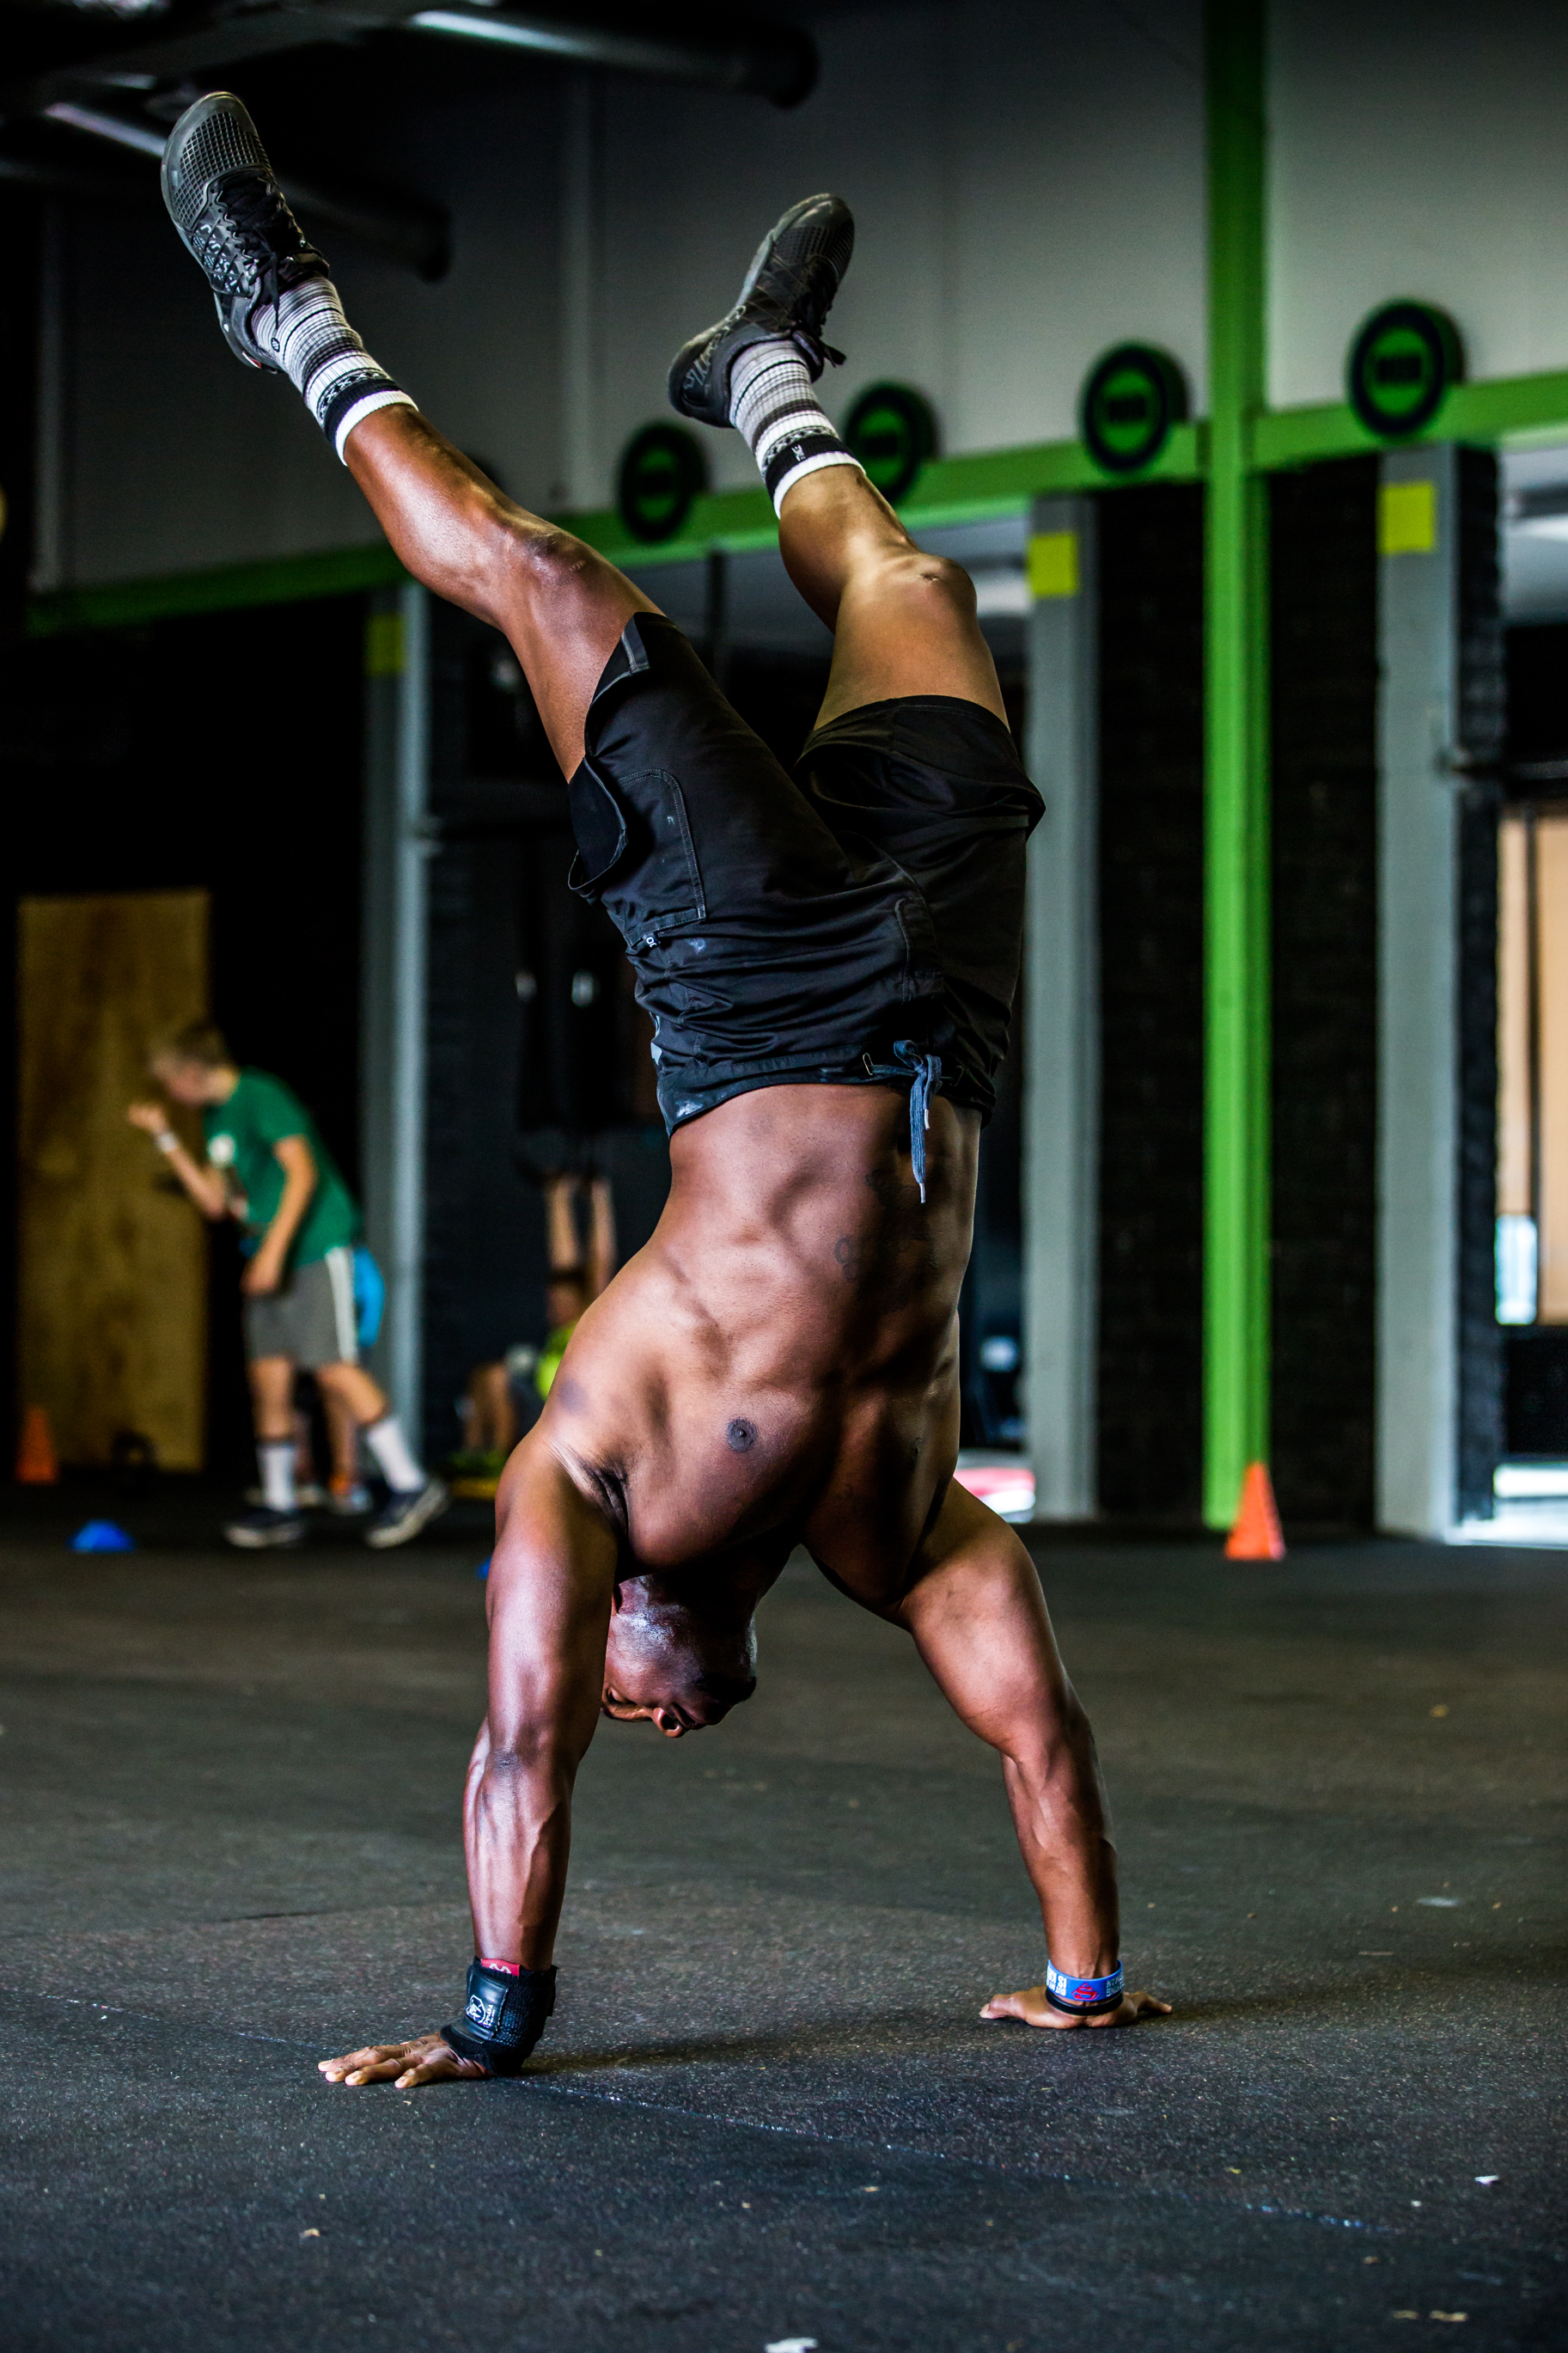
One movement that often appears in some form in the Open is the handstand. CrossFit has long viewed handstands as critical exercises to develop your athletic potential and essential components to becoming “CrossFit.” This high-skill gymnastic movement will help an athlete improve shoulder and core strength, and proprioception.
CrossFit Seminar Staff Member Nick Pappas on Handstands
CrossFit Level 1 and Kids Seminar Staff Head Trainer Nick Pappas says it’s important to master the simple before trying the fancy stuff when it comes to handstands.
“Remember, just because it's simple doesn't mean you can't make it challenging,” he says, “and the payoff will be better movement, better performance, and better health.”
If you’re new to being inverted, Pappas recommends tackling some simple progressions before attempting to kick up into a handstand.
“Kicking up is a skill all in itself,” he says.
Mastering some introductory variations will ensure that when it does come time to kick up to a handstand, you can do so safely and proficiently, under the watchful eye of an experienced coach.
Practice Kicking Up
Before attempting progressions that start with an athlete’s hands on the ground, practice the skill of maintaining a neutral spine and active shoulder before you initiate the kick up, Pappas says. This can be done with a box or object against the wall.
“Put an object against the wall,” Pappas says. “Put your hands against the edge of it so you can press into it, and then walk your feet backward until your shoulders are by your ears in an overhead position.”
“Focus on keeping a neutral spine and active shoulders by squeezing your glutes and abdominals while pressing into the box,” he continues.
Here, Nick is performing the progression described above and adding a small kick-up motion with one foot.
While this progression is meant to be simple, it does not have to be easy, Pappas reminds us. Vary the height of the object to whatever feels comfortable (the lower the object, the more challenging the movement).
Pike Handstands and Wall Walks
When an athlete is ready to get inverted, a pike handstand is a good first step.
“Pike handstands can be done with feet on the ground, and with your knees and/or toes on a box,” Pappas says. “If someone feels comfortable being upside down there, you can increase the loading of the position with a wall walk, in which an athlete slowly, and under control, takes small steps up the wall with their feet while their hands take small steps toward the wall.”
“If they can walk up, hold for 10 seconds, and then walk down, all while under control, that is a great sign that they have the prerequisites of shoulder strength to kick up into a handstand,” he says.
Handstand Push-Ups
To reiterate what Pappas said earlier, be sure you or your athletes master the simple before they attempt the plethora of advanced skills that can be performed from the handstand position.
When an athlete is ready to work toward achieving handstand push-ups, Pappas recommends a few ways to increase strength and confidence. His first suggestion is to practice the negative and work from the top down.
“Move back to the pike handstand push-up position and slowly lower yourself down to the ground. As soon as your head touches the ground, press back up,” Pappas says. “Start easy, and make it more challenging. When you make it to a pike that is challenging enough that you can no longer press up as fast, stop, make it a smidge easier, and use that as a scale for your handstand push-ups in workouts.”
There is also some accessory work that will benefit any athlete trying to achieve or improve their handstand push-ups.
“Two great pieces of accessory work for handstand push-ups are seated shoulder presses with dumbbells or kettlebells, and hollow-to-arch rolls,” Pappas says. “For the dumbbell shoulder presses, sit on a box, or to make it more challenging, sit on the ground. For the hollow-to-arch rolls, start in a laying hollow position and roll sideways to your stomach into an arch (Superman) position, and then back.”
Strict vs. Kipping
In terms of safety and efficiency, a great prerequisite is to have strict handstand push-ups before attempting kipping handstand push-ups, Pappas says.
"There are many kipping drills an athlete can practice while working on their strict handstand push-ups,” he adds. “While working on strengthening through negatives, pikes, and accessory presses, an athlete can also work on kipping away from a wall on their back, or from a headstand to a plank. Concurrently, working on awareness in the kip of a pull-up, and timing of a push press can have transference through more awareness of your body.”
Freestanding Handstands and Handstand Walking
When attempting a freestanding handstand, make sure you are on a forgiving surface in case you happen to fall, Pappas warns. The wall is a good place to start, he adds.
“Practicing shifting your body weight onto one hand while in a pike or on a wall can help you practice the movement pattern of shifting to support on a single hand, rather than trying to scamper across the ground,” Pappas says. “Sideways walks on a wall can be a great way to practice handstand walking in workouts, and even shoulder taps in a pike position can be a great start.”
When you’re ready to move to open space, Pappas suggests using a spotter with a PVC.
“If you have a spotter holding a PVC to catch you, they can provide feedback as you work on holding yourself in space,” he says. “Grip the ground, squeeze that middle tight, and keep pressing … Use your fingers to help balance, and stay active.”
Common Faults
Pappas says one common fault often occurs in the warm-up.
“A common fault is not properly warming up the wrists and hamstrings,” he says. “If your wrists hurt holding a handstand, warm them up.”
Warming up your posterior chain is equally as important to avoid pulling a hamstring when kicking up, Pappas adds.
Another fault to look out for is loss of the neutral spine position.
“You may see (an athlete’s) butt against the wall, and then a large curve going from the top of their shorts to their spine,” Pappas explains. “Squeezing your butt away from the wall and ribs toward the wall can help bring your spine back to neutral. The best bet, though, is to kick down and make that happen before kicking back up.”
Noting the specific movement standards we’ve seen in past Open workouts that contain handstand push-ups, Pappas says, “The line we've used in the past has shown many of us that in our first rep, our feet are 4 inches above the line, and slowly but surely they get closer to the line. Both (are due to) inactive shoulders, and it's important to grip the ground to remind ourselves we need to be pressing continuously.”
“Keep your feet together,” he adds.”It's the easiest way to stay tall.”
Points of Performance
When performing handstands on the wall, or holding or walking in free space, strive to hit all the following points of performance:
- Hands just outside shoulders
- Fingers spread on the ground for balance and grip
- Maintain a neutral spine
- Active shoulders
- Braced core
“Maintaining a neutral spine needs to begin before kicking up and can be done by squeezing the abdominals and the spinal erectors tightly to create an imaginary belt of stability around the lower spine. This demonstrates midline stabilization and will give the athlete the ability to keep their lower body integrated.”
When performing handstand push-ups, be sure to hit all the points of performance above as well as the following:
- Start with arms extended
- Elbows move forward on the descent
- Descend until head touches the ground slightly in front of the hands
- Hips extend before the arms press (kipping)
- Finish at full arm extension with open shoulders
“Full range of motion shows that the shoulders are in flexion to the point that the shoulders are above the hands, and under the hips in a straight line,” Pappas says. “Active shoulders are when the elbows are completely locked, and the musculature of the shoulder is supporting the weight of the body above it as well as pressing it up against gravity.”
Meeting these points of performance, Pappas says, is essential to finding success in handstand movements.
Check out the first two installments of Master the Movement here and here.